
Make your Windows XP Login Account Invisible!
Ok, If your parents have recently locked you out of their computer, then there is a way to make your account invisible, so they wont know that your account exists, and you can still logg in.
You have to edit your registry for this, so if you dont want to take the risk, then dont do it.
First off, you have to create your account.
1) Turn on computer and keep hitting F8 untill you are at the safe mode screen selection.
You have to edit your registry for this, so if you dont want to take the risk, then dont do it.
First off, you have to create your account.
1) Turn on computer and keep hitting F8 untill you are at the safe mode screen selection.
2) Logg in the administrator account, it shouldnt require a password, if it does, that means that your parents locked that account and you cant create you account.
3) If you are in, then go to control panel and create your account.
4) Restart your computer, and logg in your account. After everything is loaded, go to Start > Run > Regedit. The registry will popup.
Ok, now follow this root to make your account invisible.
HKEY_LOCAL_MACHINE\SOFTWARE\Microsoft\WindowsNT\Cu rrentVersion\Winlogon\SpecialAccounts\UserList
Now right click, and go to New > DWord Value and name it YOUR EXACT USER NAME, like if your use name is JoE then nake it JoE, if its Joe, then name it Joe.
Now the value should be zero, if it isnt, the right click the value you just made and go to Modify, and make sure Value data is 0.
Now restart, and at the log in screen, you want see your username, now hit CTRL+
Now you have to do this everytime you wanna logg in. ( the CTRL+ALT+
Multiple OS Installation Guide
How to Use Newsgroups Guide
Introduction to Newsgroup Access
"Usenet" or Newsgroup access has been around since the beginning of the internet. Usenet was created to facilitate a central point of contact for discussion on a wide range of topics.
Many web sites employ several different techniques for feedback and discussion about content. Tons of "news" sites use forums for posting the latest and greatest content and allow their viewers to provide feedback. From using complicated forums to the basic PHP scripting that is required, anything can and will happen. Forums can come in many different flavors, including "basic" read and post to fancy boards with per user stats and custom "avatars" or icons. Most, if not all mail clients also can read and post usenet articles with little hassle.
As of this writing, I use Outlook Express 6, but most "newer" E-Mail clients have the same or similar type of features. In reality, the E-Mail or News client you chose could be much better than OE in many respects. I would love to use a more "feature rich" E-Mail client, but, sometimes I am rather hard set in my ways.
You also need to note two very important things:
- I DO NOT EVER display the "Preview Pane." This is a HUGE security issue.
- In OE 6, select View --> Layout --> Layout Tab --> uncheck "Show preview pane."
- I DO NOT view "HTML stationary" (or any other inlined images) as the sender intended. I view ALL E-Mail and Newsgroups as "plain text." This also reduces the chance of executing "malicious" HTML spam and makes for easier reading of high volumes of E-Mail and Newsgroups from many different people.
- In OE 6, select Tools --> Options --> Read Tab --> check "Read all messages in plain text."
1) Shall we begin? (Image 1.1)  In Outlook Express 6.0, choose Tools --> Accounts... or you may select Set up a Newsgroups account... from the message pane. | ||||||||||||
2) Internet Accounts. (Image 1.2) | ||||||||||||
3) Internet Connection Wizard: Your Name. (Image 1.3) | ||||||||||||
4) Internet Connection Wizard: Your E-Mail Address. (Image 1.4) | ||||||||||||
5) Internet Connection Wizard: Your News Server. (Image 1.5) | ||||||||||||
6) Internet Connection Wizard: Finish. (Image 1.6) | ||||||||||||
7) Download Group Listing. (Image 1.7) | ||||||||||||
8) Newsgroup Subscriptions. (Image 1.8) |


9) Newsgroup Subscriptions. (Image 2.1) Which ever Newsgroup you subscribed to will now have an icon displayed next to it. You may now subscribe to additional Newsgroups or you can close the Newsgroup Subscriptions window by selecting Ok. | ||||
10) New Post. (Image 2.2) | ||||
11) New Post: Create Message. (Image 2.3) | ||||
12) New Message. (Image 2.4) | ||||
13) View all messages in group. (Image 2.5) | ||||
14) View Posting. (Image 2.6) | ||||
15) Reply to Group. (Image 2.7) | ||||
16) Reply Message. (Image 2.8) |


17) New Message. (Image 3.1) Again, when a new message is posted, the newsgroup appears in bold type with the amount of new messages displayed on the right hand side of the group name. Select the Newsgroup to access the new messages and view the message content. |
18) Options. (Image 3.2) |
19) Preview Pane. (Image 3.3) |
20) Outlook Express. (Image 3.4) |


I hope this guide has helped you feel more comfortable with accessing the various public News Servers available.
Browser Compatibility Information
Introduction
I support using web standards. The domain will look better in a browser that supports XHTML and CSS2, however, all text is viewable with any internet device.
Tested Browsers include IE 5.0+, Chrome 2.0, Firefox 2.0x, 3.x, Opera and Safari.
Known Issues
If you have any problems viewing the domain other than the ones listed below, please contact me and I will attempt to fix it as soon as possible!
- If you use your own style sheet or you have CSS turned off, the site will not appear as intended.
- Netscape 4.x and below will not display the domain structure properly due to zero support for DOM Level 1 (displays JavaScript errors).
- Internet Explorer 5 does not do well. I am looking into the issue.
- If you can't view any images on the domain, please read this information: Why can't I view any images on your domain?
Standards Support
This site conforms to W3C's strict XHTML 1.0 standards recommended in Jan. 2000 and CSS2 recommended in May 1999.
If you attempt to validate this page and it fails, please Contact BV so I can fix the problem. Due to the dynamic nature and the attempt by me at making the domain as accessible as possible to the widest audience, I make mistakes. I cannot check and recheck every browser, every OS, every platform, every time I make a change. You can, however, tell me about your experience.
Upgrade and Install
How to Upgrade and Install a New Hard Drive?
Notes: Before you install the new Hard Drive (HD) there are a few facts that need to be known. First of all, when installing two hard drives or any two IDE devices on the same IDE Channel (controller) you must reset the jumper settings on both drivers. Set one to Master and the other to Slave. Only two IDE devices will work per IDE Channel, sharing the same IDE cable. There are typically two IDE Channels (Primary and Secondary) on one motherboard for a total of four IDE devices allowed per system. For example, if you have a HD and a CD-ROM at the present time, you can add two more hard drives or one more hard drive and an IDE backup device. If a new hard drive is being installed onto the same Channel as the old one, make sure the original drive is set to Master and the new hard drive is set to Slave or vice versa, depending on which will be the bootable drive. If two hard drives use separate cables, both may be set as Masters.
Always use your bootable hard drive where your operating system is installed as Master on the Primary channel. Avoid sharing the IDE cable if you can. If a new hard drive is added to an old one, chances are the new one is faster and has more capacity than the older one. We suggest to use the new one as the bootable drive and the old one as a back up. After all, hard drives are much faster than the tape drives as a backup. The chance for two hard drives to go bad at the same time is very small.
The limitations described above do not apply to SCSI devices. For instance, up to seven SCSI devices can be used for the same SCSI Channel (controller) and no Master/Slave jump setting is necessary.
1. Power off the computer and remove all cables from the back of the computer.
2. Carefully remove the case screws then remove the case cover.
3. Secure the Hard Drive into the mounting bay using (4) course threaded screws. (Use the hard drive screws. DO NOT use case screws.)
4. Look at the current configuration of the computer to determine if there is an extra IDE port on your current IDE cable(s). If there are only one IDE cable and already two IDE devices, a new IDE cable must be purchased. Plug the new IDE cable into the Secondary IDE channel on the motherboard. (Be careful, watch the polarity. Match the red line on the IDE ribbon cable with Pin 1 of the IDE Channel). If there is one IDE cable with only one IDE device or two IDE cables with three or less IDE devices, there is a spare IDE port.
5. After the drive is secure, plug in the new or spare IDE port to the new hard drive. (Be careful, there is only one way to plug the IDE cable. Red pin closest to the 4-pin Power.)
6. Plug the P4 Power cable into the new hard drive.
7. Carefully put the case cover back onto the case and secure it with the case screws that were previously removed.
8. Plug all required cables into the computer and then power up the system.
9. Enter the Computer CMOS and use the Auto IDE Detection feature and then save the changes made to the CMOS and exit. This will reboot your computer.
10. Now the hard drive is mounted and connected. See next section on how to partition and format a new hard drive.
How to Partition and Format a New Hard Drive?
1. After you have physically installed the hard drive and detected it in your system BIOS, you will need a Bootable Diskette. This diskette should contain the following Files: Fdisk.exe and Format.com. The diskette you use should be a bootable diskette.
2. Insert the bootable diskette into the 1.44MB floppy drive and power on the computer.
3. When at the "A:\>" prompt, type DIR and it should show three files, Fdisk.exe, Format.com and Command.com.
4. At this point, a Partition is needed so that DOS and Windows will see the new hard drive. At A:\> type Fdisk then press enter.
5. The First screen is going to ask if Large Disk Support is desired on the new hard drive, if using Windows95, select No. If using Windows98, select yes.
6. At the Fdisk Menu, a new partition is what is needed, select #1 and press Enter
7. Then Select #1 for Primary DOS partition and press Enter
8. Fdisk will ask if the end-user want to use maximum disk space. This will allow the end-user to set various sizes of partitions to a hard drive.
9. Fdisk will ask the End-user if they want to set a specific name to the partition, if a name is not desired the press Enter when prompted.
10. After Partition is set, reboot and leave the bootable floppy in the 1.44 Floppy Drive.
11. When "A:\>" is up, type Format c: /s/q (/s = make bootable, /q = format quickly)
12. After format is complete, remove the bootable floppy and reboot the computer. Now your new hard drive is ready for operating system. Select the following links for installation guides.
How Not To Install Computer Hardware
Introduction
Most computer enthusiasts visit a computer shop on an almost daily basis, bringing home an ever-growing number of peripherals such as video cards, harddisks, DVD+/-RW drives and similar equipment that needs to be built into their computer system(s). These hardware-savvy computer enthusiasts can be easily recognized, as they start thinking about doing the next upgrade right after purchasing that new videocard and may actually never put their case side panels back on as that would only slow down a weekly upgrade. They also know all their motherboards’ BIOS settings by heart and how each affects performance. Also, don’t be surprised if they know every version number of the drivers they install and can write down a minimum of ten serial numbers for the installed third-party software.
Although such enthusiasts know what’s best for their computer systems, there’re a couple of drawbacks to this never-ending upgrade frenzy. First off, whenever these users buy a peripheral, for example a videocard, they usually bring it back within 30 days, to exchange, not refund, because the new revision of the videocard has 2.0 ns DDR SDRAM memory chips instead of 2.2 ns. Or, more commonly, they buy a motherboard and bring it back the next day ‘cause they want to use Revision X’s undocumented jumper settings, which the version they brought home does not support. And to give you a couple more fine examples, they’ll convince the service technician at the shop to pre-test their new processor, not because they want to know if it works, but because they want to be sure it runs at some insane overclocked speed. For that they bring their own system, lock themselves in a room with the technician and debate with him whether they should go with the Pentium 4 processor that runs 3.51GHz at default voltage or the one that hits 3.56GHz at 1.8 volts.
And the best one yet; they buy the next generation, state-of-the-art processor or videocard, of which the retailer has just one in stock since they are very hard to come by. They pay for it with dad’s credit card and bring it back the next day stating that it doesn’t work in their system. If the retailer browses the web that same evening he comes across a little ‘hardware’ website with just 12 people on the statcounter and a mere 6 more registered in the forums that has just done an ‘exclusive’ review of that very same product. Hopefully I’ve gotten my point across, that these enthusiasts are a retailer’s nightmare; the constant flow of hardware back and forth puts a considerable amount of stress on the retailer and his service personnel. They have to deal with awkward reasons for exchanging hardware such as perfectly fine, working videocards, unlike defective products which can be sent back to the manufacturer. As a result, they have stacks of opened boxes with products that have been used for a couple of hours each.
Well, for the sake of these retailers as well as those having to buy these opened boxes, this article covers the basics of how NOT to install newly purchased hardware. Please give it a good read and take the advice to heart. And keep in mind that it is only fair to keep the hardware you break, don't return it because of your own mistake to not properly install it. Furthermore, use these instructions at your own risk, we take NO responsibility whatsoever and do take the above with a grain of salt, we consider ourselves among the above mentioned enthusiasts too.
Opening the case
Prior to opening your case locate, but do not memorize, all of the screws you can find. If they happen to be of the Philips head variety, easily removed by using an applicable Philips screwdriver of the right size, try to select a screwdriver, flathead or otherwise, which seems sufficiently NOT suitable to remove the screws. The intention here is to improve chances of inflicting serious damage to connectors, expansion cards or other items adjacent to the screw by letting the screwdriver slip. Also, apply as much force as possible; bending the sheet metal of the case is a great measure of sufficient force, to maximize the possible damage. Also, turning the screws clockwise with excessive force is a good way to strip threads or, even better, break the head off completely, which will most likely require the purchase of a new case or the use of powertools to remove it.

The case panels and power supply secure fastened, this is not the proper way.
Furthermore it is absolutely essential to remove each and every screw within sight, especially the ones holding the powersupply and any heavy case fans mounted in your system. The effects of a powersupply falling inside the case are not to be underestimated; the same applies to the case fans. For maximum effect this should actually be attempted when the machine is still running, which will, with a little luck, cause the entire computer to short out and destroy some of its most vital and expensive parts. I reckon the effect the spinning blades of a large high rpm case fan can have on your fragile computer’s interior needs no elaboration. Now, when removing screws, don’t worry about them falling into the computer through open slots or other openings in the case, this is highly recommended. The screws not only can cause serious damage, they usually end up in places where you least want them, or cannot easily reach them, thus making you head out for the store for new ones. And there’s the added bonus of the sheer anxiety one feels when a screw is lost in the inside and cannot be found. Flipping the powerswitch can then be both a gratifying as well as an exciting undertaking, as recovery of the screw may destroy the computer.

All the screws removed and the power supply slowly falling into the PC' interior.
So far, we have found that just the removal of the case panels can result in one or more vital parts being utterly wrecked, which may well require a considerable investment to get the machine working again. Remounting the case panels back on should be done with care too, as I mentioned, you’re not to memorize the actual location of the screws, but rather screw them into any opening you see fit. Favorite locations include input/output connectors of sound- and videocards as well as voltage selectors for 110/240 volts operation. Also any holes which look like they have live parts, or electronic components, mounted right behind them are definitely prime candidates. Also having screws left over after the case has been re-attached is a big plus, as this will most likely result in components not being fastened properly.
Mounting peripherals
Whenever you mount a CD-ROM drive, a harddisk or a floppy drive, be sure to use the wrong type of screw; use the small ones for the harddisk and the big ones for the CD-ROM and floppy drive. Applying excessive force when mounting these peripherals again is a big plus, but keep in mind that for maximum effect they should actually not be fastened securely and must NOT be mounted with more than one screw. If you're constantly moving your case around, then try NOT to do so in a careful manner, but rather jerk it around. Dropping it on a concrete floor from an adequate height of course is a great way to test overall structural integrity, and maximum effect is attained with ill-fastened peripherals. The effects of a harddisk or any other heavy peripheral crashing around inside your case are not to be sneered at, especially with the computer switched on.

Mounting the motherboard, notice the correct orientation of the copper standoffs.
Furthermore, when mounting a motherboard, be sure to use all supplied copper standoffs and place them in a random location, then, contrary to the peripherals, fasten the screws holding the motherboard down as securely as possible. Mis-aligning the motherboard, if at all feasible, is a great way to inflict further damage. The reason for mounting the motherboard securely is two-fold, first off we want the motherboard to be as rigid as possible as to raise our chances of inflicting damage on add-in cards. Secondly we want the randomly placed copper standoffs to make maximum contact with any motherboard pins underneat, increasing the chance of a motherboard short-circuit.
Mounting add-on cards
When purchasing an add-on card you will undoubtedly have noticed that most come in a shiny silver wrapping; this wrapping is not for show, but rather is designed to protect the card from static electricity. Static electricity can be used to render just about any electrical component or add-on card unusable. For maximum effect put on a pair of rubber boots, and walk over synthetic carpet; sliding your feet back and forth is a great way to boost static charge. Now take the add-on card out of his protective wrapping and grab it firmly with both hands, and be sure to touch any exposed metal, component pins or other connectors. Repeat a couple of times to increase chances of success. In case you don’t have a pair of rubber boots handy, a wool sweater can be used as an alternative. Rub it firmly across a piece of plastic, abs or nylon is preferred to charge it and then discharge it against the add-on card. Touching any exposed metal, component pins or connectors is recommended. Take notice of the crackling sound, which is a good indication of a job well done.

Placing an AGP card in a PCI slot, excessive force is needed to accomplish this feat.
Actually mounting the add-on card in the appropriate slot on the motherboard is another great way of rendering it unusable. When inserting the card into the slot, be sure to mis-align the card and push it down with as much force as possible; hopefully this will result in the slot connector pins being bent down, rendering the slot unusable. Applying force to the add-on card sideways is also a great way to ‘pop’ components off the card. Most are so small that they can easily fit between other components’ pins or even in an adjacent slot connector, inflicting further damage. Obviously, trying to insert an AGP card in a PCI slot and vice versa seems impossible, but might be worth a try; who knows what kind of performance we’d get out of such a combination?
Connecting cables
When we’ve ‘successfully’ installed our peripherals and add-on cards, hooking the cables up wrongly is another great way to do some more damage. Most modern motherboards come with floppy and harddisk cables that have a pin-alignment system, which is supposedly meant to prevent us from hooking up the cables in the wrong way, well they were mistaken. It is still very possible, and recommended, for example, to plug the floppy cable into a harddisk connector, which will make booting from floppy rather difficult. Also the pin-alignment systems are usually made out of plastic, and as with all plastic, if you apply enough force it gives a little. Thus we are able to mis-align those connectors; we only need to apply a little more force. Also take notice that mis-aligning the cables on both sides results in a perfectly working system which is not the objective here.

The correct way of routing cables inside a case, no cable ties are required for a perfect finish.
Cables are also great to stop fans from spinning, clutter up your case, and plugging one extension cable, like the kind used on CPU Coolers, into another is almost a guarantee for a messy interior. Therefor cable ties should be avoided at all cost. Just leave all those cables hanging loose, and, if possible, bring ‘m nearer to any add-on cards with onboard connectors. One might just be long enough to contact one of the powersupply’s plugs, which will, 99% of the time, result in some small scale fireworks. Also, an ATX powersupply plug is not supposed to be mis-aligned with the motherboards connector, but in this case, such a misalignment might prove to be just what the doctor ordered. It’s best to try this with cheap powersupplies, as they usually lack a secondary fuse and ‘overcurrent’ protection. Be advised to keep a finger on the powerswitch and have a fire-extinguisher handy as things may get ‘hot’. One other great way to render a properly functioning powersupply unusable is by setting it to 110 volts and run it off a 240 volt outlet. Or, alternatively, stick large metal objects with insulated grips, like screwdrivers, through the holes in the casing, touching live parts in the process.
Configuring the BIOS
If all else has failed and the system boots normally, the next best thing to do is ‘configure’ the BIOS. By that I mean flashing it with a random file from your harddisk. If a flash BIOS is ‘flashed’ with the wrong data, such as a BIOS for a completely different motherboard, or, more effectively, with any random file on your harddisk, the motherboard will, upon rebooting, cease to function until its BIOS chip is physically removed and re-programmed or replaced with one holding the correct data. Using a somewhat older flash utility is the best way to go about it, as these usually have no checksum or file-version checks and can upload just about any file into the BIOS. Alternatively, because of lack of a file of suitable size, or a flash utility willing to flash a random file to our BIOS, ‘update’ the motherboard with the oldest BIOS you can find and be sure to pull the powercable during the update process.

Replacing a defective BIOS chip by using a screwdriver, push hard and fast for best result.
However, there’s more fun to be had. Suppose you want to replace the BIOS after the above mentioned ‘configuration’, then we’ll have to physically remove the BIOS chip and replace it with a new one. Removing it, however, can be just as productive as ‘configuring’ it. Most BIOS chips are socketed, meaning that the chip resides in a socket, much like your CPU, but without a lever. Thus, in order to get it out of the socket we have to use something else as a ‘lever’. A prime candidate is a screwdriver; by carefully prying on alternate sides, the BIOS chip can be successfully removed, but as before, that’s not the objective here. Prying it on one side until it pops right out of its socket is the best way to end up with severely bent or broken pins. If enough force is applied and the socket is of high enough quality, the BIOS chip can be effectively snapped in two, or can be ripped right off the motherboard with the socket still attached, resulting in unrecoverable motherboard damage.
Configuring the motherboard
Most modern motherboards are jumperless, or at least most of the commonly used features can be set through the BIOS. However that usually still leaves a whole slew of jumpers on the motherboard, some of which might even be undocumented. This opens up a whole new perspective, as we are now faced with the possibility of finding an undocumented setting that might propel the motherboard to unforeseen heights as well as acquiring fame across the world as the first person to actually document this undocumented setting. The most effective way of finding these settings is to have a couple of spare jumper caps handy, then subsequently placing ‘m randomly across the motherboard and watch for changes when the system boots up.

Placing jumper caps in random locations, the desired result is to burn traces off the motherboard.
A piece of paper and a pen for taking notes is not recommended, as the repetitive placing of the jumper caps on the wrong location might damage the motherboard beyond recovery. Thus in the light of this exercise, the sooner such damage occurs the better. Placing jumper caps over fan connectors, WOL, SB-Link or other connectors is a great way to render these unusable, as well as do considerable damage to the motherboard. For example, placing a jumper cap over two pins connected to +12 volts and Ground, might effectively ‘burn’ the traces leading up to this jumper off of the motherboard, resulting in unrecoverable damage to the motherboard.
Mounting the processor
CPUs come in various packages, ranging from the old and almost forgotten Socket-3 used for 486 computers, up to the very latest 940 pin socket for AMD’s Athlon 64 FX. Current CPUs have unfortunately got proper precautions built in to counter the effects of a mis-alignment, which we can only circumvent with brute force, by simply forcing the CPU into the socket. Thereby bending pins at an angle that'll make them snap right off when we try to realign them later on, which is a tried and tested method of turning your $500 processor into a keychain. But there’re other ways of damaging a CPU without actually mis-aligning it in its motherboard socket.

The CPU moments before we trigger the power switch, this is the last time we see it's core in one piece.
The most popular is the operation of a CPU without a CPU cooler; be careful to have a stopwatch handy, ‘cause we’re talking seconds here. Before we actually remove the CPU cooler we configure the BIOS to the absolute maximum ratings in both MHz and core-voltage. Upon removal of the CPU cooler we turn on the computer system and start the stopwatch, then we observe how far the computer makes it into the Windows bootup process. Anything beyond the ‘Windows XP startup logo’, usually a few seconds in, is already a tad too far, you’re simply not trying hard enough.

A misaligned CPU cooler about to be secured in place by a firm and resolute push on the right hand clip.
One other way of destroying CPUs is misaligning the CPU cooler, this works best with AMD processors as the CPU core is not protected by a metal heatspreader and very fragile. Normally a CPU cooler is placed onto the processor by carefully taking note of the correct orientation, aligning the clips and then gently pushing them down to secure a snug fit. Obviously we can damage or utterly destroy the fragile CPU core by placing the CPU cooler on the wrong way and then press down hard to still make the clips meet with the socket lugs. This will either result in the CPU core being chipped or cracked, which will effectively render it unusable or the socket lugs being snapped off which means we’ll have to replace the motherboard. Either way we’ll have inflicted serious damage to our computer, requiring an early replacement of the CPU, motherboard or both.
Conclusion
If all else fails, there's one more option for the brave hearted, which should only be attempted by the most experienced and 'skilled' computer enthusiasts. With the help of a screwdriver we can over volt the entire system and run all components within at a before unheard of clockspeed. This mother of all overclocks will propel your system to new heights by using the most powerful source of power available at your house, AC current at 110 or 240 volts. By inserting a screwdriver through the power supply' fan grill one can, with a little luck, simply take out the power supply 'bottleneck'.

Not for the faint hearted, the ultimate over volt, taking care of the power supply bottleneck.
With the ‘instructions’ from the previous pages you should be able to destroy or thoroughly damage the most vital and expensive parts in your computer. Now you can finally do an upgrade because you really need one, instead of for a mere 0.2% increase in framerate, or for a chance to try out some ‘cool’ new peripheral. As a DISCLAIMER, the above is meant for AMUSEMENT and is NOT to be taken seriously. We take no responsibility whatsoever if you want to try some of these ‘instructions’; do so at your own risk. Furthermore the pictures you see in this article are meant to illustrate what could happen with any of the instructions we provided, no hardware was damaged in the process. And in case you're wondering we did not use any part of a similar article from Dan at Dan's Data, but we both covered all of the requirements to utterly destroy your computer with little effort.
Introduction
At some point in a computer operators lifetime, a need arises that many people do not even know is possible: Multiple OS's on a single computer.
Whether or not you:
- Require the extreme speed for gaming that, currently, only Win98 can offer.
- Desire the stability and enhanced memory management in Windows 2000 or XP.
- Wish to tinker with "the other guy's," such as Unix, Linux, or FreeBSD, just to name a few.
No matter what your need, Multiple OS's could fill that void.
Here, I put together an example of installing:
- Windows Me
- Windows XP Home
- Red Hat Linux
You may choose what ever combination desired, but, take note: Read your license agreement that came with your operating system to ensure that you are allowed a multi-boot environment.
A few points to consider before beginning the adventure:
- Decide what OS's you wish to install "before" beginning. This will avoid many headaches later on. Remember, if something gets messed up in the process, you could destroy all of your installs and hours of work. Planning is key to avoiding the simple, but disastrous mistakes.
- Plan out your partitioning scheme. With larger hard drives, it is best to have at least 10GB for each OS installation for drivers, etc. For this guide, I use very small partitions. Your results may vary:
- C:\ 1000 MB Windows 98
- D:\ 2000 MB Windows XP Home
- E:\ 4000 MB Red Hat Linux
- F:\ 2000 MB Shared Data
- G:\ 8000 MB Games
- Consider "how" to format each partition to ensure your requirements are met. For example, Windows 98 cannot read a partition formatted as NTFS, nor can Windows access a drive formatted with efs3 for Linux. As a result, the drive letters assigned may change due to the current OS not being able to read one or more of the partitions. To be on the safe side, it is always advisable to create a "shared" partition formatted with the "most common" file system to allow easy transfer between OS's. Currently, that system could be "FAT16."
- I ALWAYS install OS's in a very predictable order:
- DOS or other "early" OS.
- Windows 95, then 98, then Me. You could skip one or more.
- Windows 2000, then XP Home, then XP Pro. Again, you can skip one or more, depending on your requirements.
- "Other" OS's, such as Red Hat Linux, FreeBSD, or many others.
- Some "OEM" versions of Windows or "Recovery CD's" are not the full OS. With vast differences in these disks, I cannot predict if an "Upgrade" CD will detect your previous version properly, nor can I assume that "every" OS will be visible for you.
- Windows may "Upgrade" your previous installation if using an "upgrade" version of a newer OS. This is also is a factor when attempting to install another OS on the same partition. It is always best to split them up as described in step 2 and use "full versions."
- As a precaution, think steps 1 to 6 through again. :)
With the plan in hand, we can now begin:
Boot Using a Floppy1) Windows Me boot floppy: (Image 1.1) |
2) No partitions are detected: Image 1.2) |


At this point, if you are unaware of how FDISK works, please check my Using FDISK Guide.
If you are aware of how to partition your hard drives using FDISK, please continue.
After Using FDISK3) Partition Information: (Image 1.3) |
4) Extended DOS Partition Information: (Image 1.4) |
5) Format the C:\ or first partition: (Image 1.5) |
6) After formatting: (Image 1.6) |
7) Installing the OS: (Image 1.7) |


For this Guide, I chose to install Windows XP Home as my "second" OS. I am not going to redo the complete guide here, but will touch on some important issues:
After the First OS install8) After Windows ME install: (Image 1.8) |
9) Format options: (Image 1.9)If you format your partition as NTFS, you will not be able to access it from another OS, other than NT/2000 and XP. This could be a good thing. If you still wish for the added security of NTFS, format it as such and place all of your "shared" data on another partition. Here, I chose FAT16, but I recommend NTFS. |
10) Windows boot menu: (Image 1.10) |
11) ADVANCED TECHNIQUE - boot.ini: (Image 1.11) |


You can choose what ever OS Install Guide you wish, but I selected Red Hat Linux 7.2 next. As a result of that decision, the following technique was added to make things "easier."
After Windows XP Home install12) FDISK take 2: (Image 1.12) |
13) Delete a logical drive: (Image 1.13) |
14) Delete with FDISK: (Image 1.14) |
15) Confirm the selection: (Image 1.15) |


Again, you can choose what ever OS Install Guide you wish, but my choice was Red Hat Linux.
Check out the Full Install Guide for Red Hat 8.0 because I am only going to hit on the high points with Red Hat 7.2 here:
After Re-running FDISK16) After Re-running FDISK: (Image 1.16) |
17) Automatic partitioning: (Image 1.17) |
18) Automatic partitioning results: (Image 1.18) |
19) Boot loader selection: (Image 1.19) |
20) Create a Linux boot disk: (Image 1.20) |


I hope your Multi-Boot system works well for you!
E-Mail Filtering Guide
Introduction to E-mail Filtering
Spam and virus's has been a problem for many years but only until recently has people started to become disgusted with it. Performance could also be a concern for many people. One of those people is me. I do not like to use an additional program to combat something that should not be there from the start.
This guide explains how I fight spam and gives a few pointers as to what you can do without downloading an additional program. I also have included information on how to spot an E-Mail virus without any additional software. Only thing it takes is a little knowledge and the ability to refrain from opening every E-Mail you get, regardless of where it came from. What people do not understand is that the user must do something to get a virus. It is not magic. That something, a very high percentage of the time, is click and open an infected E-Mail. DO NOT DO THIS!
Something to consider is the fact that the E-Mail filters and spam filtering do NOT work with HTTP E-Mail accounts, such as Hotmail and Yahoo. Most of those kind of services offer filtering of their own. Use it.
This guide also offers a sneak peek inside Black Viper's inbox.
As of this writing, I use Outlook Express 6, but most "newer" E-Mail clients have the same or similar type of features. In reality, the E-Mail client you chose could be much better than OE in many respects. I would love to use a more "feature rich" E-Mail client, but, sometimes I am rather hard set in my ways.
You also need to note two very important things:
- I DO NOT EVER display the "Preview Pane." This is a HUGE security issue.
- In OE 6, select View --> Layout --> Layout Tab --> uncheck Show preview pane.
- In Outlook 2002, select View --> Preview Pane (toggle: select to disable, select to enable)
- In Outlook 2003, select View --> Reading Pane --> select Off
- I DO NOT view "HTML stationary" (or any other inlined images) as the sender intended. I view ALL E-Mail as "plain text." This also reduces the chance of executing "malicious" HTML spam and makes for easier reading of high volumes of E-Mail from many different people.
- In OE 6, select Tools --> Options --> Read Tab --> check Read all messages in plain text. (Option available with IE6 SP1 installed).
- In Outlook 2002, you must download the latest service pack and add a setting in the registry. Instructions on how to do this is here: http://support.microsoft.com/default.aspx?scid=kb;en-us;307594
- Ensure you have the latest service pack already installed and you can download and apply this registry patch: Outlook2002PlainTextFix.zip ~ 330 bytes
- In Outlook 2003, select Tools --> Options --> Preferences Tab --> E-mail options... button --> check Read all standard mail in plain text.
1) Shall we begin? (Image 1.1) | ||||||||||||
2) Deleted Items. (Image 1.2) | ||||||||||||
3) blackviper.com Inbox. (Image 1.3) | ||||||||||||
4) This is my Filtered Spam. (Image 1.4) | ||||||||||||
5) Attachment reporting. (Image 1.5) |


Do I own AV software? Yes. When do I scan the network? Before anything major, like an OS install or massive hardware change. That way, I know that all of my backed up data has been scanned with the latest virus protection and clear of anything up to that date. I then install the OS clean and retrieve my safe data and continue as usual without AV software sucking up resources 24/7. Another reason I have avoided infection is I use a computer strictly for E-Mail. That's it. If anything should happen, such as unexplained memory, hard disk activity, network activity or many other ways to spot a malicious program, I can stop it before catastrophe hits. This also greatly reduces the chance of "important" files being infected across the network because the system that I use for "normal" activities has NO shared resources. Most people cannot afford having a dedicated system taking care of such types of tasks. However, a pretty clever way of discovering a virus or worm that is scanning the always targeted Windows Address Book is to place a "unique" address that is never used for anything other than to seed. Most providers have options of multiple E-Mail accounts. Have a disposable one that is used for all "sign up, place E-Mail address here" forms, one is used for "close friends and family" and another could be "black83648viper6253@mycoolisp.com." This extended garbage would "attempt" to ensure dictionary spammers would not easily hit it and, if you ever get an E-Mail to that address, it would be the first clue of possible malicious activity. Not a guarantee by no means, but at least it could prompt additional investigation. AGAIN: I will always recommend my readers use a virus scanner daily and keep it up to date. There is no reason not to. If you have a single system directly connected to the internet you WILL have virus and firewall protection installed. Security is no laughing matter. Enough said. |
6) Check the "real" contents of a suspicious email. (Image 1.6) |
7) Details Tab. (Image 1.7) |
8) Email Source. (Image 1.8) |


How can you create filters to do the same as what I have displayed here? Easy. READ MORE...
How to filter your E-Mail using Outlook Express
Spam and virus's do not have to get you down. Here, I take a look at the filters I use for the results you viewed on the previous page. It is not magic. With effective filters, a huge amount of spam can be dealt with behind the scenes with tools you already have at your disposal.
9) Creating Filters in Outlook Express. (Image 2.1) |
10) Viewing Rules. (Image 2.2) |
11) Adding New Rules. (Image 2.3) |
12) This is my "Default Subject Line" filter. (Image 2.4) |
13) This filter detects "Diet" spam key words in the subject line. (Image 2.5) |
14) This filter detects "General" spam words in the subject line. (Image 2.6)  Here I am looking for particular words, like "mortgage, free, $," etc in the subject line and highlighting the message Red, then moving it to the "SPAM" folder. To avoid hate mail, I will not show my "p0rn" filter publicly, but I am sure that you get the point as to the words I filter. |
15) This filter passes any other E-Mails that do not meet any previous rules to the SPAM folder. (Image 2.7) |
16) Blocking Domains. (Image 2.8) |


I hope this offered some insight into the techniques I use to, not only fight spam, but identify the clever virus's out there attempting to suck up bandwidth from the rest of the internet. If this has helped you, feel free to Contact BV, but, remember, leave the default subject line intact... or your E-Mail could be tagged and automatically deleted as spam.
The other day I came across a clients computer that was getting the infamous Blue Screen of Death (aka BSOD). However, since the computer had the “Automatically Restart if the event of a bluescreen” option switched on, the system would restart and the blue screen disappear too quickly for me to read. Most technicians will just go into Safe Mode and switch this off, but what if you cant get into Safe Mode? What happens if the option to “Disable Automatic Restart” doesn’t show in the F8 menu either?
I had this happen to me and I found a way around it. Read on.
For those of you who aren’t familiar with the blue screen of death. It is a screen that shows up when Windows has a critical failure. It has messages of what went wrong with the computer and can greatly help technicians figure out what is causing the error.
Anyway, most of the time this “automatically restart” option isn’t a problem for computer technicians because we can just log into Windows Safe Mode (F8) and turn it off by doing the following:
Right Click on “My Computer” and goto “Properties”. Then goto the “Advanced” tab and under the headline “Startup and Recovery”, press the “Settings” button. Untick the “Automatically Restart” box and press Ok.
However, in this instance Safe Mode wouldn’t start up either. In most cases if you press F8 after a BSOD crash you will have the option “Disable Automatic Restart”. I wasn’t getting that either. So here is my way to turn off Automatic Restart.
Note: You will need access to a working computer to do these steps. You will also need a fairly good knowledge of computers, BIOS and registry editing in order to do this. This article is aimed towards computer technicians.
1. If you don’t have it already, download UBCD4Win using one of the mirrors here. To run it, create an ISO and burn it to CD you can read the instructions here. I wont write the instructions here because the ones on the previous link are better and this article is more targeted at computer technicians and most of them already have this CD.
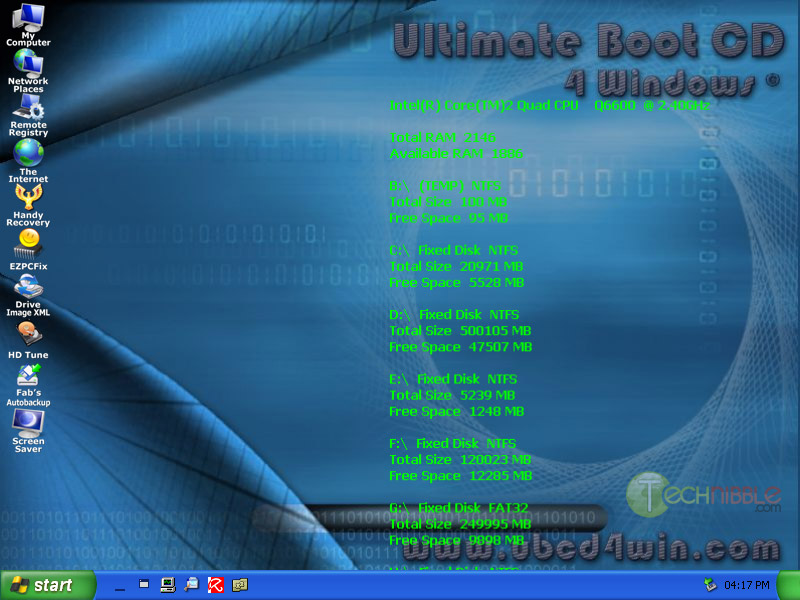
2. Once the CD has been created, goto the BIOS and make sure your CDRom is set as the first boot device. Start up the computer with UBCD4Win in the CDRom and you will have some boot options. Choose the “Launch The Ultimate Boot CD for Windows” option.
It will take a few minutes to load fully, but when it does you should see a Windows XP like interface like in the picture below:

3. In the UBCD4Win interface, goto Start > Programs > Registry Tools > RegEdit(Remote)
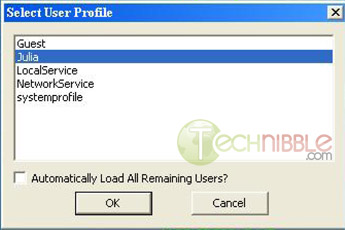
4. The program will then ask “Do you wish to load remote user profile(s) for scanning?”. Choose Yes.
5. It will then ask you to “Select User Profile”. Choose the main user account. It may be “Administrator” or some other username (but not Local Service, NetworkService or systemprofile). In the instance of the screenshot below, its “Julia”.

6. Now you should see a Window named “Registry Editor” which is identical to the usual “regedit” under Windows. Navigate to the following key:
HKEY_LOCAL_MACHINE\SYSTEM\ControlSet001\Control\CrashControl
7. In here you will find a key named “AutoReboot”. Double click on it to edit its DWORD Value and under “Value Data:” the current value should be 1, which means AutoReboot is turned on. Change this to 0 (which turns it off) and press OK.

8. Restart the machine and try and boot into the normal Windows mode. You should now see the blue screen of death. Write down the “STOP:” number and the error message. You can look for the solution up using Google or check out our article on common blue screen error messages.
Join N/A other readers and subscribe to Technibbles Email Digest and receive new posts sent directly to your inbox. All new signups get a copy of our Computer Technicians Quick Reference Guide free. Signup Now!
Sometimes we will set the window password to prevent other people using it but how about if you forgot the setting password? here i show you how to access and log in to your computer
Step 1 - After power on your computer (before window logo appear), then press F8 key access to safe mode and select safe mode with command prompt.
Step 2 - After entered into window, selected the 'administrator' account and it will show up command prompt.

Step 3 - Now we use 'Net' command to add another window user, for example add a user name jet, key in net user jet /add into command prompt.
Step 4 - Upgraded new user to administrator level, net local group administrators jet /add key in into command prompt.
Step 5 - Press Ctrl+Alt+Delete, select 'shutdown' -> 'restart'.
Step 6 - After restart, the window will appear new user,

If your 'administrator' account already set up the password, the method that mentioned above can't be use.
Forgot Your Window Password?